Editorial Solution
- If we analyze the task carefully,
- We need a varying voltage source. For that, we will use a potentiometer from the range of 1k to 10k Ω.
- To print voltage we will use Serial Monitor.
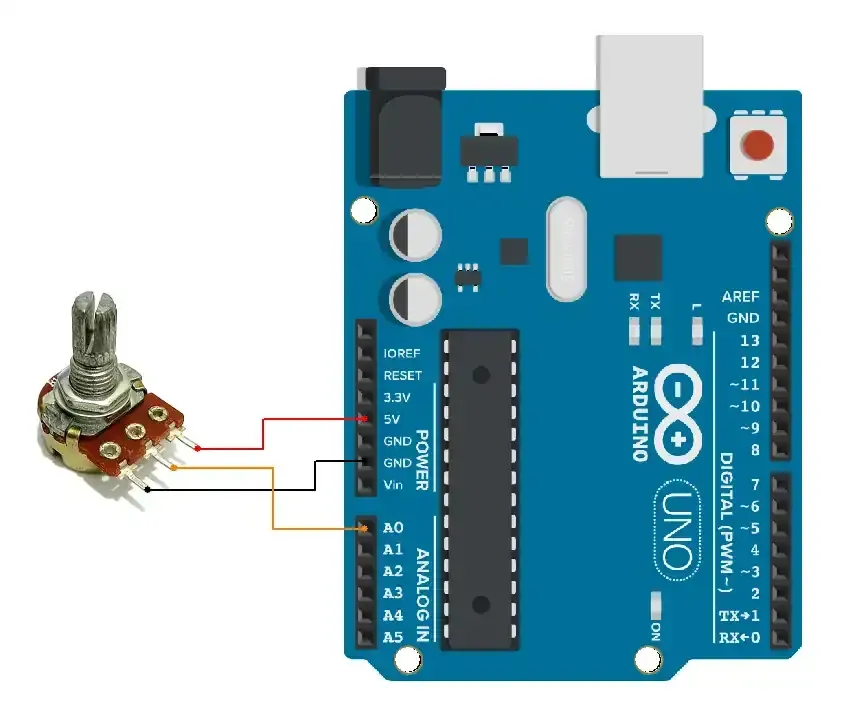
- The circuit is connected as shown in the diagram below.
Connection

- Let us write the code for this voltmeter setup. It is very straightforward :
- Read analog value
- Convert analog value to voltage
- Print on Serial monitor
Code
// Pin for analog input
const int analogPin = A0;

void setup() {
  Serial.begin(9600);
}

void loop() {
  // Read the raw ADC value (10-bit resolution: 0 to 1023)
  int adcValue = analogRead(analogPin);

  // Convert the ADC value to voltage
  // 5V reference, voltage = (adcValue * 5.0) / 1023
  float voltage = adcValue * (5.0 / 1023.0);

  // Print the ADC value and corresponding voltage
  Serial.print("ADC Value: ");
  Serial.print(adcValue);
  Serial.print(" | Voltage: ");
  Serial.print(voltage);
  Serial.println(" V");

  // Wait for a short time before taking another reading
  delay(500);  // 500ms delay
}
Code explanation
- We will be using an A0 pin for voltage measurement.
- The code performs the following tasks, which are listed with their respective functions:
analogRead(analogPin): reads ADC value.float voltage = adcValue * (5.0 / 1023.0): converts ADC_value to voltage.Serial.print: print ADC_value and Voltage.
Output
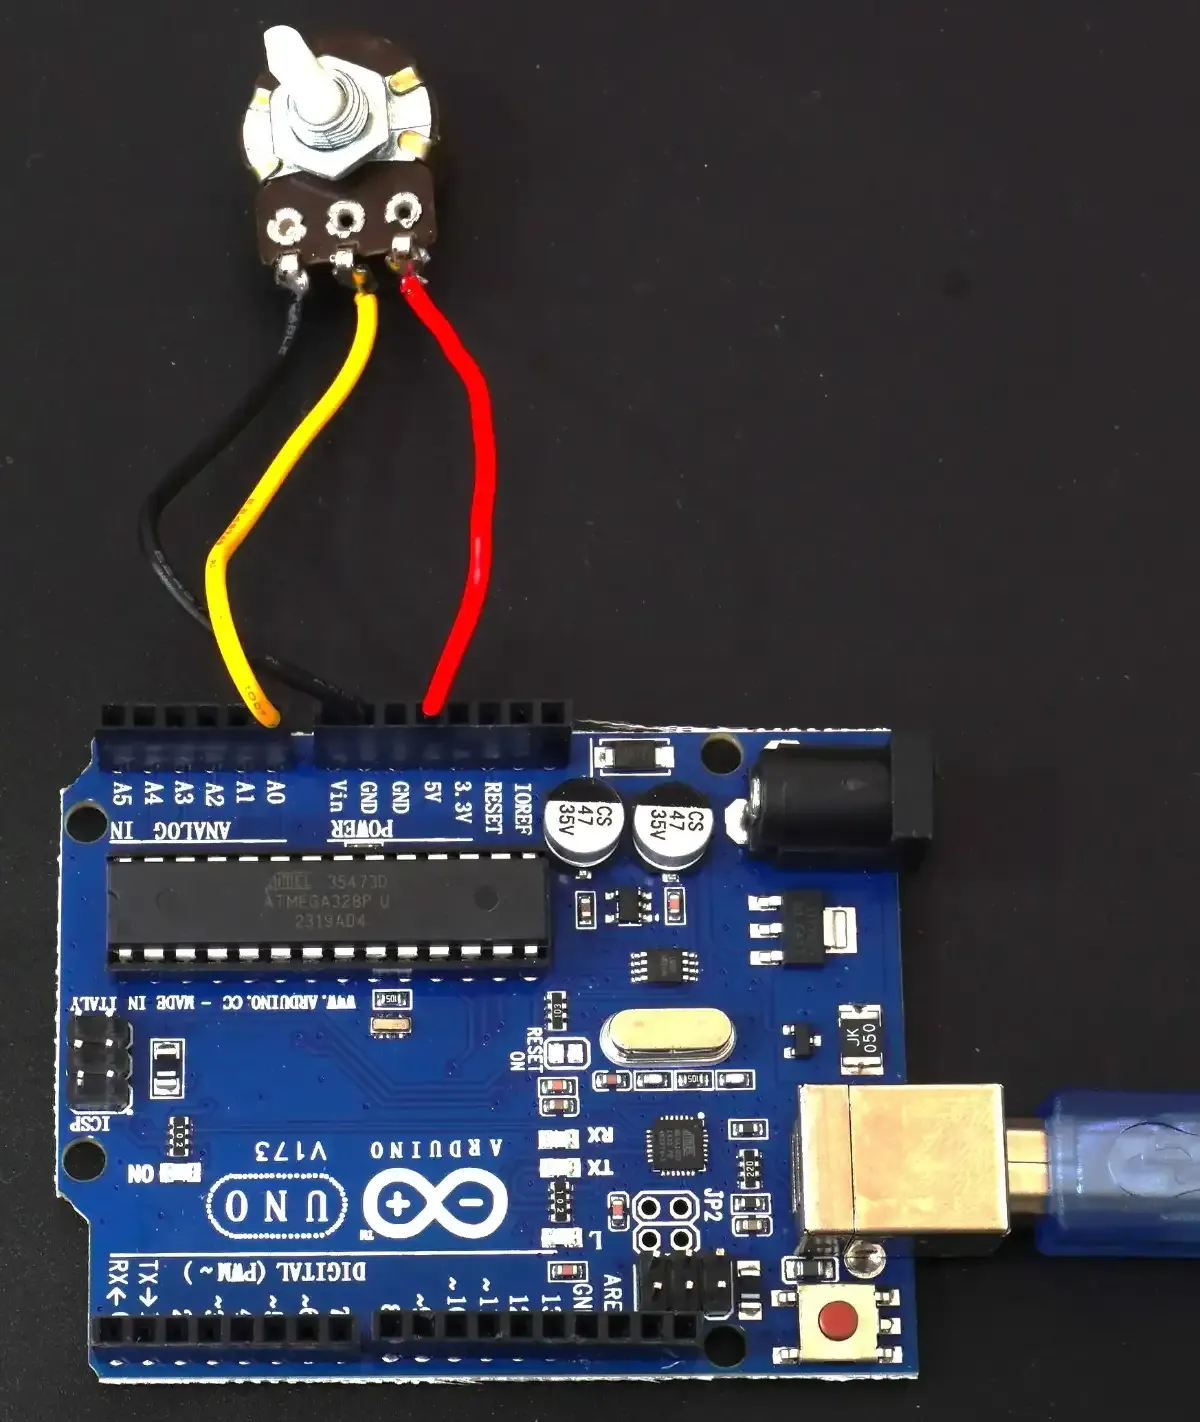
The circuit connection is as follows

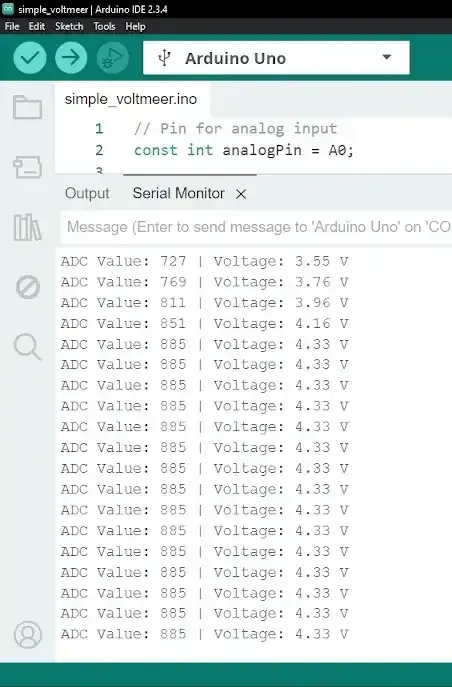
The output of the voltmeter readings is as follows

- As we can see in the video, the Voltage change is successfully detected and printed on the Serial monitor.
Limitations
- Our voltmeter can measure with the accuracy of +- 4.88 mV. To improve voltmeter accuracy we need to use ADC with higher resolution.
- The potentiometer output pin produces 0V (GND); it is not exactly 0V. Some current flows and ADC readings randomly shift from 0 to 1 (around 5 mV fluctuations).