Editorial Solution
If we analyze the task carefully,
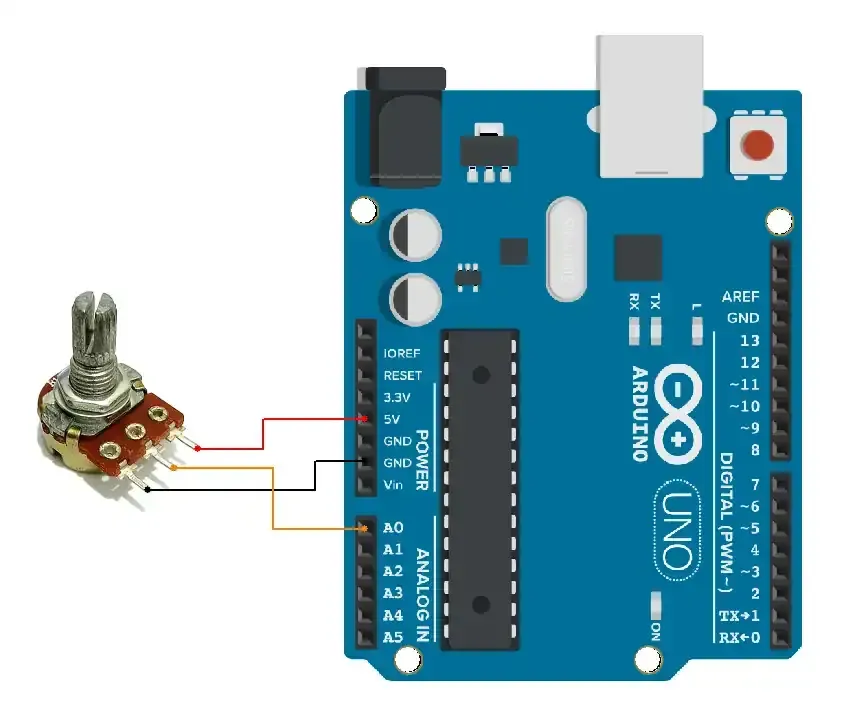
- We need a varying voltage source. For that, we will use a potentiometer (0V to 5V).
- To print voltage we will use a Serial monitor.
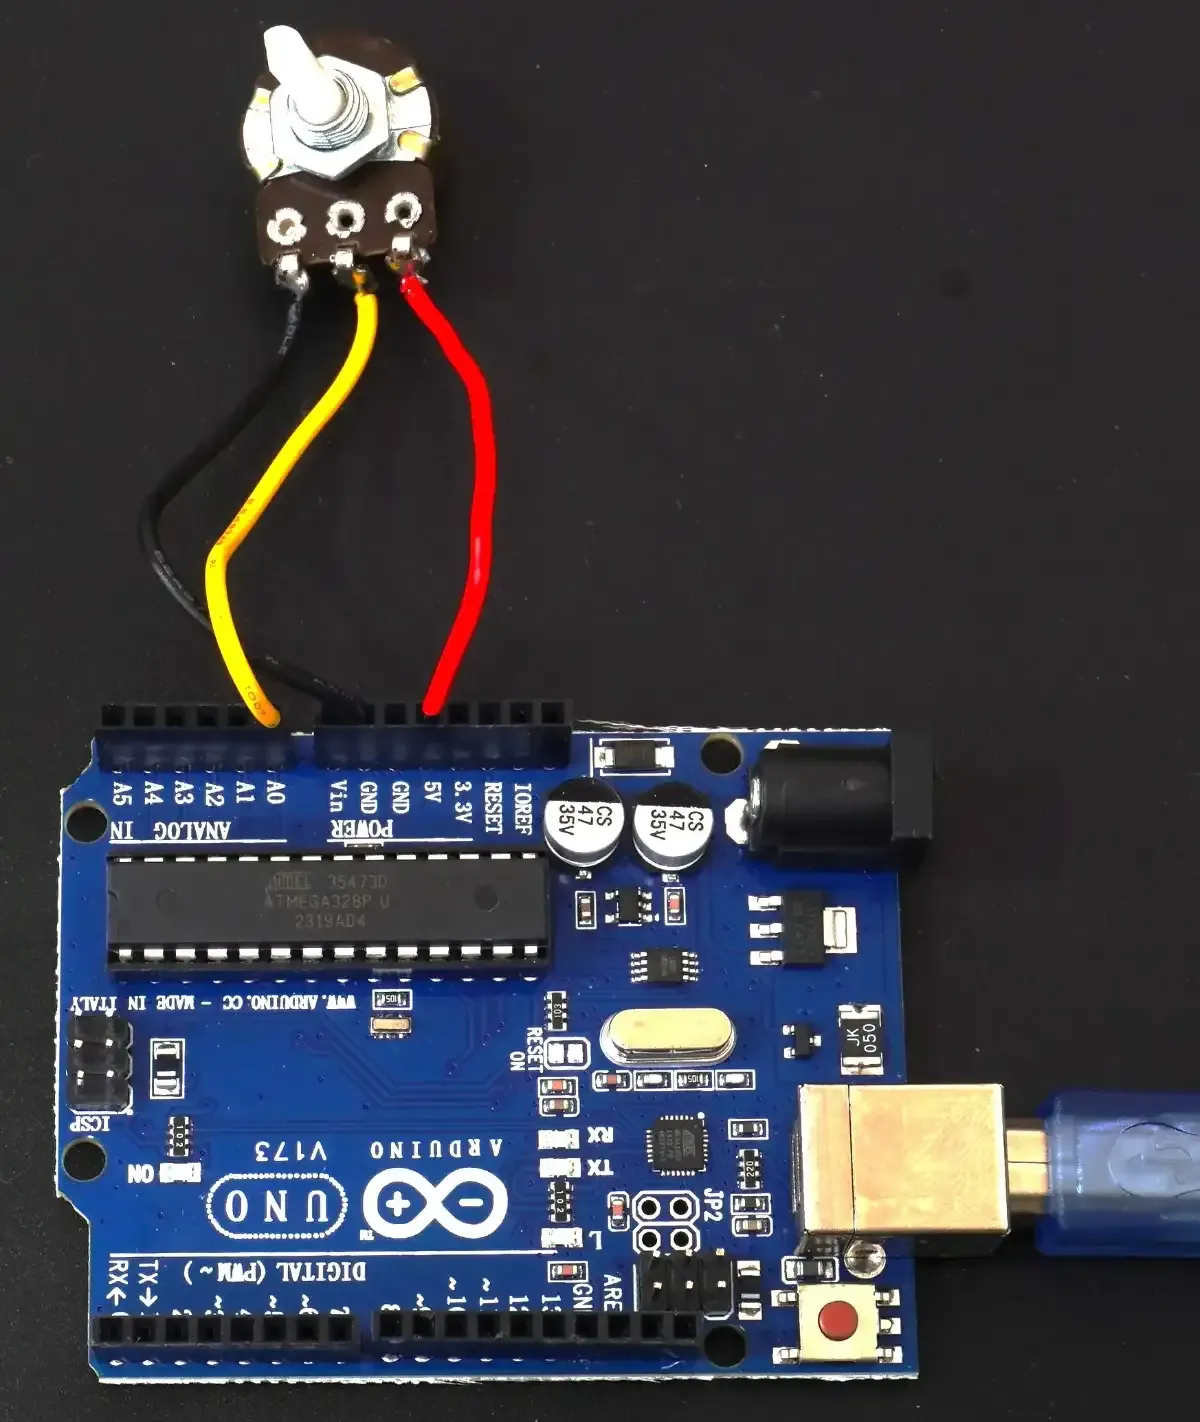
- The circuit is connected as shown in the diagram below.
Connection

- Let us write the code for this voltmeter setup. It is slightly tricky. Why?
- We need a 1mV resolution of Arduino UNO’s ADC. For that, we can shift its Vref to INTERNAL (1.1V). But, the maximum voltage we can measure is 1.1V.
- To measure Voltage up to 5V, we need to set Vref to DEFAULT (5V).
- So we will use the following approach to switch Vref
- Set Vref → 1.1 V
- If the analog value read is 1023, means the voltage is more than 1.1V
- Change Vref → 5 V
- Measure voltage & print on the serial monitor.
- If the voltage is below 1.1 V, measure the voltage and print on the Serial monitor.
The code used is given below:
Code
uint8_t current_analog_reference;  // global variable storing current analog reference

void setup() {
 Serial.begin(9600);

 // Set the initial reference voltage to INTERNAL (1.1V)
 analogReference(INTERNAL);
 current_analog_reference = INTERNAL;
}

void loop() {
 int analog_value = analogRead(A0);

 float voltage;

 // Switch to DEFAULT (5V) if the analog value is greater than or equal to 1024
 if (analog_value == 1023 && current_analog_reference == INTERNAL) {
   analogReference(DEFAULT);
   current_analog_reference = DEFAULT;
 }

 // Switch back to INTERNAL (1.1V) if the analog value is below 225 in DEFAULT mode
 if (analog_value < 225 && current_analog_reference == DEFAULT) {
   analogReference(INTERNAL);
   current_analog_reference = INTERNAL;
 }

analog_value = analogRead(A0);

 if (current_analog_reference == DEFAULT) {
   // calculate voltage if the reference is set to DEFAULT (5V)
   voltage = (analog_value * 5.0) / 1023;
 } else {
   // calculate voltage if the reference is set to INTERNAL (1.1V)
   voltage = (analog_value * 1.1) / 1023;
 }

 // Print the analog value and the corresponding voltage to the Serial Monitor
 Serial.print("Analog Value: ");
 Serial.print(analog_value);
 Serial.print(" | Voltage: ");
 Serial.println(voltage, 3);

 delay(500);
}
Code explanation
The code flow is listed above, but some statements & functions used (that might be unknown) perform the task as listed below:
analogReference(INTERNAL): Initially, the Analog reference Aref is set toINTERNALwhich is 1.1 Volts.
if (analog_value == 1023 && current_analog_reference == INTERNAL): Here we check if the analog value read is equal to 1023 i.e. more than 1.1 Volt. If yes, then we switch the analog reference toDEFAULT(5 Volt), and then again we read the analog value.
if (analog_value < 225 && current_analog_reference == DEFAULT): Similar to the above check, if the analog reference is set to 5 volts and the analog read is less than 225 (1.1 Volts), then we will switch the current analog reference toINTERNAL(1.1 Volts) for more accuracy.
voltage = (analog_value * Aref) / 1023: calculate the voltage from the ADC analog value that is read. Note, hereArefwill change based on analog reference (5Volts or 1.1 Volts).
Serial.print(): print analog value and Voltage on Serial monitor.
Output

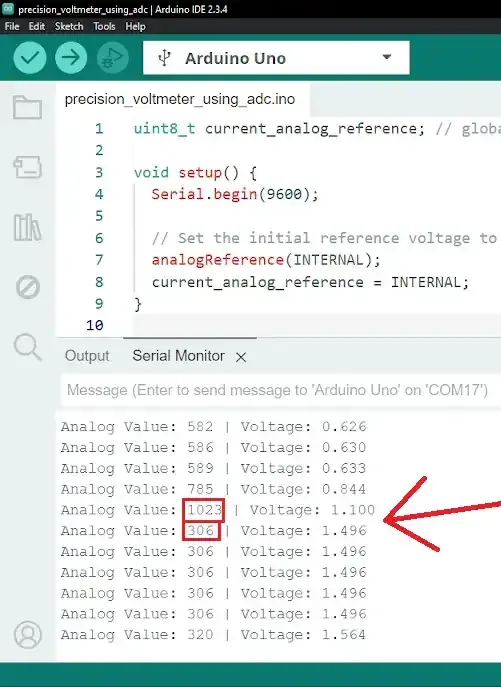
As we can observe in the above image, the analog value switches from 1023 to 306, indicating its Analog reference for ADC has switched from INTERNAL(1.1 V) to DEFAULT(5 V).

Output video
- As we can see in the video, the Voltage change is successfully detected and printed on the Serial monitor.
- To verify that the voltage is measured down to 1mV, we are printing analog values & voltage.
- We can observe the analog reference switch in the video.